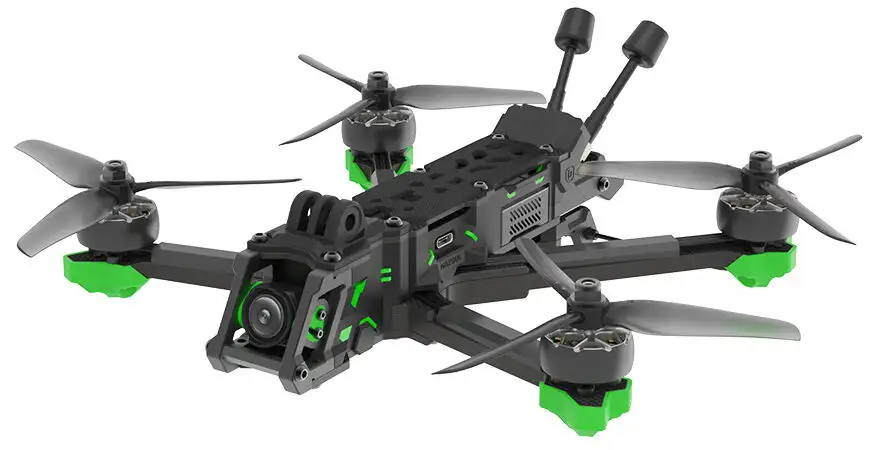


All these holes and hollows in the carbon are made for making the frame lighter but these area are prone to break during a crash. The frame is less rigid, and don’t cool down any better the electronic. It’s just pleasing to the eye nothing else. I suspect the carbon also to be of a lesser quality. First FPV frame I broke in 5 years… luckily the DJI O3 camera is fine. Up to 2 weeks ago I was flying Armattan quad frames.
Quick review of the Nazgul Evoque v2
Good:
- The design is great
- The full frame kit, including LEDs, beeper, TPU part is 69$ in Aliexpress and 89.- in Switzerland. A bargain but it should not break in the first place! so prize is somehow not relevant.
Bad:
- It has way too much holes and hollow in the carbon at strategic places, make it somehow fragile. To be confirmed in 6 months.
- it seems carbon is somehow cheap compared to other brands.
- the controller is specific for the narrow frame. There is no way to use another or reuse an old flight controller. All the electronic is tightly packed

Neutral:
- don’t fly it in CE mode, this is a DJI O3 issue, use FCC or you can not fly more than 30m away behind a small tree Recognizing a bad FPV (First Person View) frame is important to ensure a smooth and enjoyable flying experience while using your FPV drone. A bad frame can lead to poor flight performance, instability, and even crashes.
Here are some tips to help you recognize a bad FPV frame:
Build Quality and Material: Inspect the quality of materials used in the frame’s construction. Look for frames made from durable materials like carbon fiber or similar composites. Avoid frames made from weak or brittle materials that might break easily upon impact. Check for any visible defects, such as cracks, sharp edges, or poor finish. These can indicate a low-quality frame that might not hold up well during flights.
Design and Layout: Analyze the frame’s design and layout. Look for proper motor and component mounting points that provide balance and stability. Check if the frame has enough space for all your components, including flight controller, ESCs, battery, and camera.
Frame Weight and Rigidity: A good FPV frame strikes a balance between weight and rigidity. Frames that are too heavy might limit flight performance, while frames that are too flimsy can lead to vibrations and instability. Hold the frame in your hand and gently flex it. If it feels excessively flexible or weak, it might not provide the necessary support for your components.
Soldering Points and Joints: Inspect the soldering points on the frame, especially at motor mounts and power distribution points. Poor soldering can lead to electrical issues and potential crashes. Ensure that all joints are properly aligned and securely fastened.
Compatibility with Components: Check if the frame is compatible with your chosen components, such as the size of your flight controller, camera, and battery. Verify that there’s enough space to mount your FPV camera and other accessories without interference. F
Feedback and Reviews: Research online for reviews and feedback from other FPV enthusiasts who have used the same frame. This can give you insights into potential issues and whether the frame is worth considering.
Known Brand and Reputation: Frames from reputable FPV brands often have better quality control and design. Investing in a frame from a trusted brand can increase your chances of getting a good-quality product.
Flight Performance and Stability: Once you have built the drone using the frame, pay attention to how it performs in flight. If you notice unusual vibrations, wobbles, or instability, it could be a sign of a bad frame.
Crash Resistance: While crashes are unavoidable in FPV flying, a good frame should be able to withstand moderate crashes without major damage. Examine the frame after a few crashes to see if it’s holding up well.

